
Charging cables often break easily due to weak connections between the charging head and wires. Additionally, careless handling can lead to cracks and breaks, rendering the cable useless for charging. If you find yourself in this situation, there are several techniques you can try to fix your charger cord. This article explores those methods and offers potential solutions for fixing a broken cell phone charger cord. So, keep reading how to fix a broken cell phone charger cord.
Here are some steps to solve the charger cord quickly and efficiently. We recommend Sugru, the moldable glue.
Table of Contents
Toggle
- The Better One is Sugru - Quick & Even Better.
- 4 Steps to Bend a Charger Cord or Wire:
- Here are Some Cool Steps to Try and Fix a Damaged Cable.
- Method 1 - Using Electrical Tape:
- Technical Fixes To Fix The Broken Cell Phone Charger Cord:
- Method 2 – Using a Heat Shrink Tube and Heat Gun:
- Method 3 - Repairing the Wiring Using a Soldering Iron:
- Test The Charger Cord:
- Tips To Keep Your Charger Cord Safe & Protective:
- Conclusion:
- FAQs (Frequently Asked Questions)
The Better One is Sugru - Quick & Even Better.
Sugru, also known as Formerol, is a unique moldable glue offering an effective, longer-lasting solution for repairing broken charger cables. When exposed to air, this innovative silicone-based substance transforms into a durable rubber-like material.
Simply mold Sugru around the damaged area and allow it to cure for approximately 24 hours. You can provide a more permanent fix and enhance the cable’s lifespan. Applying Sugru throughout the cable length is advisable to prevent future damage and enjoy prolonged usage. Additionally, Sugru is tough enough to mend broken power cables.
4 Steps to Bend a Charger Cord or Wire:
- Unplug your charger from the socket and check if the USB plug is bent.
- Soften the charger port by using a hairdryer on its highest heat setting. Keep the hair dryer at a distance and apply heat for about 30 seconds.
- Straighten the bent port using tweezers or your hand. Be gentle to avoid damaging the charger port.
- Do not apply excessive force if the charger port does not straighten even after repeated attempts.
For fixing a bent wire, gently straighten it using your hands. Avoid using heat in this case.
Remember: When removing the charger, hold the port and pull it straight without applying an angle. This will prevent any damage to the port.
Here are Some Cool Steps to Try and Fix a Damaged Cable.
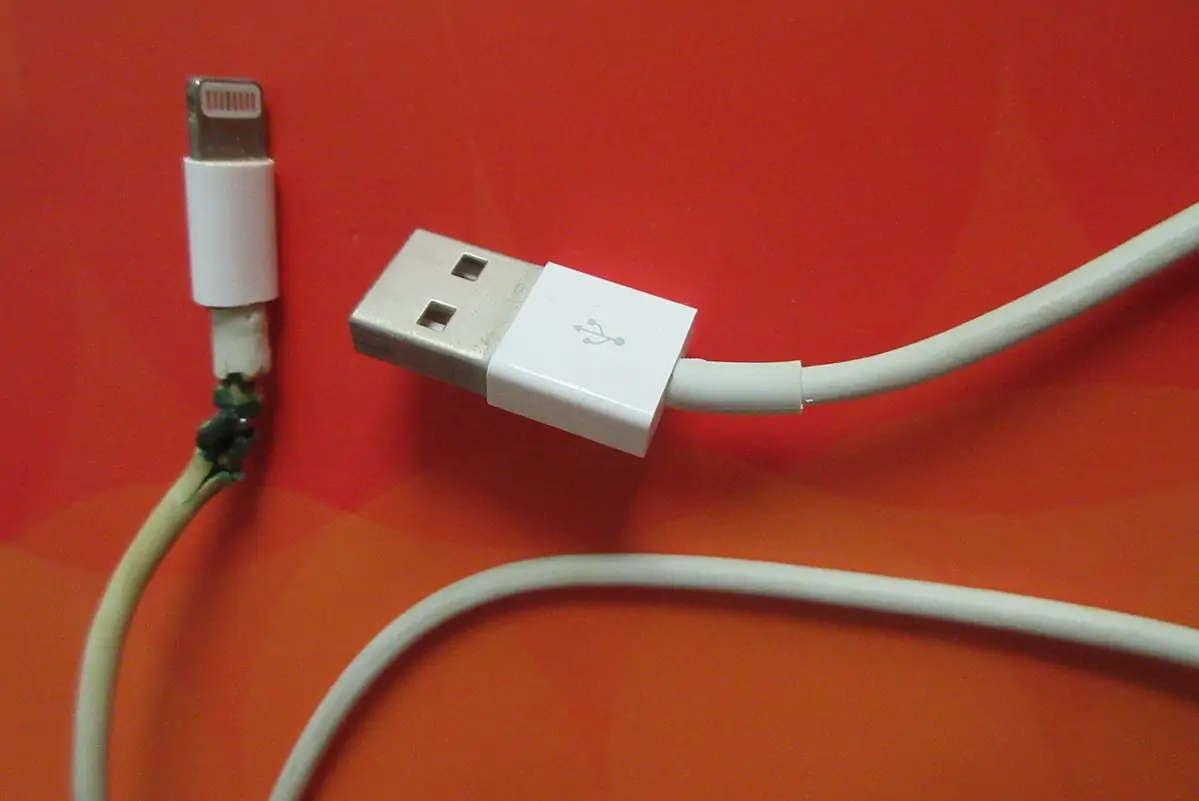
- Assess the cable for any cracks or splits, particularly around the cable’s connection point and charging port.
- If there is a split or crack found, follow these methods to repair the cable:
Method 1 - Using Electrical Tape:
- Get some electrical tape.
- Wrap the tape tightly around the split/crack to bind it back together.
- This may be enough to fix the connection and make the cable work again.
Pro Tip: Use a Cord protector
Using cord protectors is a pro tip to prevent your charger cable from bending near the port. They are readily available on Amazon and are relatively affordable as well. The best part is that they do not restrict your charger’s flexibility.
Technical Fixes To Fix The Broken Cell Phone Charger Cord:
Given that common solutions to fix your charger cord problem. Here are some technical solutions. You can try to fix your charger. So, read on; How to fix a broken cell phone charger cord”
Method 2 – Using a Heat Shrink Tube and Heat Gun:
- Purchase heat shrink tubes with a 3:1 ratio (2:1 ratio tubes are not strong enough for typical iPhone chargers).
- Get a compact and easy-to-hold heat gun for precision work.
- Cut the heat-shrink tubing to the appropriate length. Ensure it covers a small part of the charging head and the split in the cable.
- Use pliers to hold the heat shrink tubing in place, and apply heat using the heat gun. Rotate the cable to ensure even shrinking.
- Continue shrinking until the tubing has a uniform and secure fit around the charging head and the Cord.
Allow the cable to cool and set for a few minutes.
Method 3 - Repairing the Wiring Using a Soldering Iron:
If the issue is not the connection between the charger head and cable but a faulty wire inside the cable, you may need a soldering iron.
Gather the necessary tools, including a cutting iron, soldering wire, and glue gun.
Test The Charger Cord:
Test the Charger Cord Once you have completed the repair, it’s time to check if your charger cord is functioning correctly. Plug it into your cell phone and power source to ensure it charges without issues.
Please note: If the cable is severely damaged, it may be best to purchase a replacement.
Tips To Keep Your Charger Cord Safe & Protective:
It’s important to take preventive measures to avoid charger damage. So, follow these tips to keep your charger in good condition:
- When plugging or unplugging, avoid twisting or bending the Cord.
- Don’t let pets or small children chew on or play with the charger.
(Cats usually had a bad habit of chewing the wires. Therefore, cats often hit the charger cord. But, in many instances, it seems like the bite that broke the outer layer of rubber. So, if the charger is still working, it is safe to use. Repair it with electrical tape.)
- Avoid placing heavy objects on top of the charger cord.
- Consider investing in a high-quality charger less likely to bend or break.
Conclusion:
Fixing a broken cell phone charger cord is a straightforward process that saves you time and money. By following the steps outlined in this article, you can repair your charger cord and continue using your cell phone without interruptions. Remember to exercise caution and patience while repairing to ensure a successful outcome.
Given that information, we’re trying to fix the broken charger cord, but as a matter of fact, be sure to buy a new one. It’s a severe fire risk to use a broken charger. So, get it replaced immediately.
Pure genius, you’re, so don’t Pull the Charger from the Cord. Pulling out the charger from our phones by holding the Cord puts unnecessary stress on the weak Cord, making it more prone to bending.
FAQs (Frequently Asked Questions)
Can I use any electrical tape for the repair?
It is recommended to use electrical tape specifically designed for electrical repairs to ensure reliability and safety.
How long can a repaired charger cord last?
The longevity of a repaired charger cord depends on various factors, such as the quality of the repair and how it is handled. With proper care, it can last for a considerable amount of time. The advice is to buy a new one.
Can I use these repair methods for other types of cords?
While the techniques discussed in this article are primarily focused on cell phone charger cords, they can also be applied to other types of cords, such as laptop chargers or headphones.
Is it safe to use a bent charger?
Using a bent charger is not secure or recommended. Aside from the fact that it won’t charge your phone, a bent charger with broken or twisted pins can also pose a fire hazard. If you suspect your charger is bent in a way that can cause harm, it is better to replace it with a new charger.