
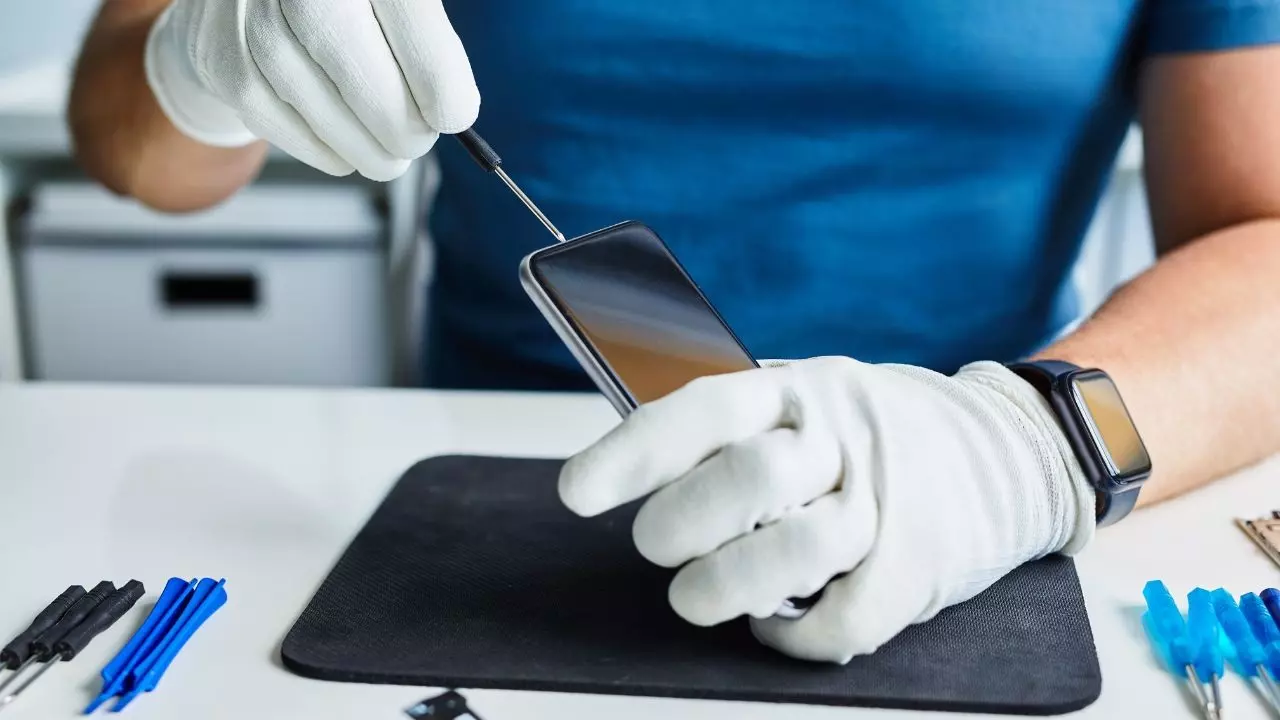
What happens when our beloved devices encounter technical glitches or screen shatters? Fret not, for we have the perfect solution! Introducing “10 Foolproof Steps to Fix Your Smartphone Like a Pro. Read “How to fix your smartphone”.
It’s a comprehensive guide on How To Fix Your Smartphone. This is your go-to resource for tackling common smartphone issues and restoring your device to its former glory. Whether you’re dealing with a frozen screen, a drained battery, or a cracked display, our step-by-step instructions will empower you to become your smartphone technician.
You can find everything from troubleshooting tips to DIY repairs here. So, wave goodbye to those hefty repair bills and say hello to self-sufficiency.
Get ready to dive into the world of smartphone repair and reclaim control over your device. Let’s fix it like a pro!
Table of Contents
Toggle
- Common Smartphone Issues
- Tools Needed for Smartphone Repairs
- Conclusion and Final Tips For Smartphone Repairs
- Comparison Of Some Popular Devices and Services
Common Smartphone Issues
Smartphones, while incredibly advanced, are not immune to technical issues. Whether it’s a software glitch or a hardware malfunction, these problems can be frustrating and costly. Before we dive into the step-by-step guide on how to fix your smartphone, let’s take a look at some of the most common smartphone issues you might encounter:
- 1. Frozen screen: Your smartphone becomes unresponsive, and the screen refuses to register any touch commands.
- 2. Drained battery: Your battery drains quickly, leaving you with limited usage time.
- 3. Charging problems: Your device doesn’t charge properly or doesn’t charge at all.
- 4. Cracked screen: The nightmare of every smartphone owner is that a cracked screen can affect your device’s functionality and aesthetics.
- 5. Camera issues: Blurry photos, camera app crashes, or malfunctioning lenses can hinder your photography experience.
- 6. Faulty buttons or connectors: Non-responsive buttons or loose connectors can make it challenging to use your smartphone.
- 7. Water damage: Accidental spills or submersion in water can cause severe damage to your device.
Now that we better understand the problems we might encounter let’s gather the necessary tools for smartphone repairs.
Tools Needed for Smartphone Repairs
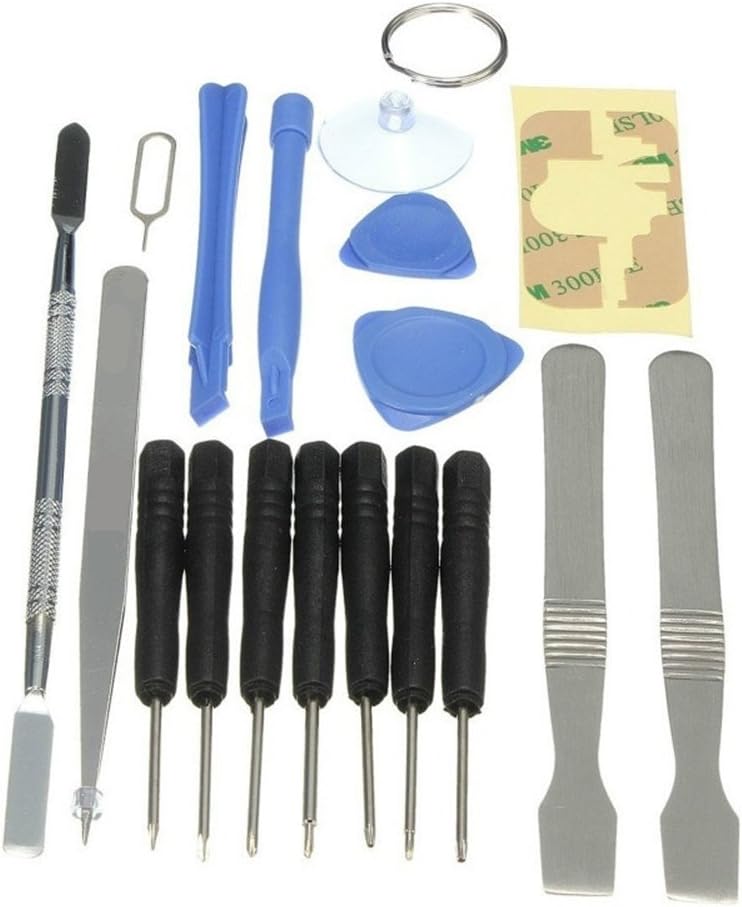
Before you start fixing your smartphone, having the right tools at your disposal is essential. Here are the tools you’ll need:
- 1. Screwdrivers: Different smartphones require different screwdriver sizes. Invest in a set with various sizes to cover all possibilities.
- 2. Prying tools: These tools help you safely open your device without causing any damage to the delicate components.
- 3. Tweezers: Tweezers are handy for handling small parts and connectors.
- 4. Suction cups: Suction cups help remove screens or back panels without leaving any scratches.
- 5. Heat gun or hair dryer: A heat gun or hair dryer can help soften the adhesive, making it easier to separate components.
- 6. Replacement parts: Depending on the issue you’re facing, you might need to purchase replacement parts such as batteries, screens, or buttons. Research and find the right parts for your specific smartphone model.
Now that we have all the necessary tools let’s begin the step-by-step process of fixing your smartphone.
Assess the Problem
Before attempting any repairs, it’s essential to diagnose the problem accurately. Start by observing the symptoms and researching common issues associated with your smartphone model. Check online forums or manufacturer websites for troubleshooting guides specific to your device. Understanding the problem will help you determine the appropriate course of action.
If you need help identifying the problem, it’s best to contact customer support or consult a professional technician. Remember, it’s always better to seek assistance if you’re unsure rather than risk causing further damage.
Backup Your Data
Before proceeding with any repairs, it’s crucial to back up your data. This step ensures you retain valuable information during the repair process. Connect your smartphone to a computer or use cloud storage services to create a backup of your photos, videos, contacts, and other essential files.
Once you have a complete backup, you can proceed with the repairs without fearing losing any data. Keep the backup handy until you’ve successfully fixed your smartphone.
Troubleshoot Software Issues
Software issues can often be resolved without any physical repairs. To begin, try doing a soft reset on your device. This is done by simultaneously holding down the power and volume buttons until the device restarts. If the problem persists, try clearing cache data or performing a factory reset. Be sure to back up your data.
If the software issues persist, you may need to update your device’s operating system or seek assistance from the manufacturer’s support team. Software-related problems are common and can usually be resolved with simple steps.
Replace the Battery
One of the most common smartphone issues is a drained or faulty battery. If you’re experiencing poor battery life or your device refuses to turn on, a battery replacement may be necessary. Start by removing the back panel of your device and disconnecting the old battery. Take note of the battery’s model number and order a replacement online.
Once the new battery arrives, carefully connect it to the device and secure it in place. Replace the back panel and power on your smartphone. You should now have a fully functional battery.
Fix Charging Problems
If your smartphone isn’t charging correctly or not charging at all, it’s time to troubleshoot the charging port. Start by ensuring that the charging cable and adapter are working correctly. Try using a different cable or adapter to see if the problem exists. Inspect the charging port for debris or dirt if that doesn’t solve the issue.
Use a toothpick or a soft brush to clean the port gently. Don’t damage any of the connectors. If the problem persists, you may need to replace the charging port. Consult a professional technician or follow an online guide specific to your smartphone model for detailed instructions on replacing the charging port.
Repair a Cracked Screen.
A cracked screen is a common issue that can affect the functionality and aesthetics of your smartphone. You can replace the screen yourself if you’re up to the challenge. You can also read our guide on how to repair broken phone screens at home. Start by removing the back panel and disconnecting the battery. Then, carefully remove the broken screen using a prying tool or suction cup. Take note of the screen’s model number and order a replacement online.
Once the new screen arrives, follow the provided instructions to connect it to your device. Be sure to handle the screen with care to avoid any damage. Once the screen is securely in place, reassemble your smartphone and power it on to ensure the new screen is working correctly.
Fix Camera Issues
Camera issues can be frustrating, especially if you enjoy capturing moments with your smartphone. If your camera app crashes frequently or produces blurry photos, it’s time to troubleshoot. Start by clearing the camera app cache and restarting your device. If that doesn’t solve the problem, ensure that your device’s software is up to date.
If the issue persists, you may need to replace the camera module. Consult an online guide or seek professional assistance for detailed instructions on replacing the camera module.
Replace Faulty Buttons or Connectors.
Non-responsive buttons or loose connectors can make it difficult to use your smartphone effectively. If you’re experiencing issues with buttons or connectors, it’s time to replace them. Start by removing the back panel and disconnecting the battery. Then, carefully remove the faulty buttons or connectors using a prying tool or tweezers.
Take note of the model number and order replacement parts online. Follow the instructions to connect the new features to your device once the new features arrive. Be sure to handle the parts with care to avoid any damage. Once the buttons or connectors are securely placed, reassemble your smartphone and ensure the new components function correctly.
Repair Water Damage
Accidental spills or submersions in water can cause severe damage to your smartphone. If your device gets wet, it is essential to take immediate action. Firstly, switch off your device and remove the battery. Use a dry cloth or paper towel to remove excess moisture from the external surfaces.
Please do not use a hairdryer or other heating device, as it can cause further damage. Once you’ve removed the excess moisture, place your smartphone in a bowl of uncooked rice or silica gel packets. Leave it there for at least 48 hours to absorb the remaining moisture. After the drying period, reassemble your smartphone and power it on to check if it’s functioning correctly. If the water damage is severe or your device doesn’t turn on, it’s best to consult a professional technician.
Final Testing and Reassembly
Congratulations! You’ve made it to the final step of the repair process. Before fully reassembling your smartphone, performing a final testing phase is essential. Power on your device and check if all the repaired components function correctly. Test the screen, buttons, camera, and charging port to ensure everything works.
If everything checks out, proceed to reassemble your smartphone by following the reverse steps of the disassembly process. Take your time and be gentle to avoid any damage. Once fully reassembled your device, power it on and enjoy your repaired smartphone.
Conclusion and Final Tips For Smartphone Repairs
Congratulations on successfully fixing your smartphone like a pro! Following the ten foolproof steps outlined in this comprehensive guide, you’ve taken control of your device’s repairs and saved yourself from expensive repair bills. Remember, practice makes perfect, and the more you familiarize yourself with the repair process, the more confident you’ll become in tackling future issues.
Here are a few final tips to keep in mind when you’re searching for the right guide on “How to fix your smartphone:
– Always research and understand the problem before attempting any repairs.
– Be patient during the repair process. It may take time.
– Follow online guides or seek professional assistance if you need clarification.
– Use the appropriate tools for each repair to avoid causing further damage.
– Keep a backup of your data before starting any repairs.
– If a repair seems too challenging or the issue is severe, consult a professional technician.
With your newfound knowledge and skills, you can confidently fix common smartphone issues and reclaim control over your device. Say goodbye to costly repairs and hello to self-sufficiency. Happy repairing!
Suppose you can’t fix your smartphone issue by yourself. Let’s take professional repair service. Here’s a handy comparison between devices and repair costs.
Comparison Of Some Popular Devices and Services
As of January 2023, we have compared the prices for third-party smartphone repairs from reputable services. If you do not see a third-party price listed, contacting the website directly for a quote is recommended.
Third-party repair costs for screen replacements may not always be cheaper than the manufacturer’s official repair service. However, there are exceptions. Apple charges £146.44 for fixing a broken iPhone SE (2020) screen, whereas Phones Rescue offers a screen repair for less than £40.
We could not obtain official repair costs for some devices due to the brand requiring additional information about the phone, possibly even requiring the device to be shared for analysis.
If repair costs play a role in your decision-making process or if you find having this information during the handset selection process helpful, we encourage you to conduct thorough research in advance.
Screen Replacement Costs Compared
| Make and Model | Retail price | Official Screen Replacement Cost | Cheapest 3rd Party Repair Cost |
| Samsung Galaxy A22 5G | £209 | £99 | £99.95(Timpson) |
| Samsung A52 5G | £399 | £109 | £125(Square Repair) |
| Samsung S21 5G | £769 | £219 | £220(Fix Factor) |
| Samsung S22 Ultra | £1,149 | £259 | £299(iSmash) |
| Apple iPhone SE 2020 | £399 | £146.44 | £39.99(Phones Rescue) |
| Apple iPhone 12 | £629 | £266.44 | £99.99(Phones Rescue) |
| Apple iPhone 13 Mini | £679 | £216.44 | £239(iSmash) |
| Apple iPhone 13 Pro Max | £1,049 | £316.44 | Must enquire |
| Google Pixel 5 | £599 (now discontinued) | Dependent on condition | £160(Square Repair) |
| Google Pixel 6 Pro | £849 | Dependent on condition | £199(iSmash) |
| Xiaomi 11 Lite 5G NE | £309 | £86.12 (plus £26.45 inspection and £18 shipping cost) | Unavailable |
| Xiaomi 12 | £649 | £105.80 (plus £26.45 inspection and £18 shipping cost) | Unavailable |
| OnePlus Nord 2 5G | £399 | £61 | Must enquire |
| OnePlus 9 | £629 | £155 | Must enquire |
| Oppo A54 5G | £219 | £61.60 | Must enquire |
| Oppo Find X3 Neo 5G | £699 | £168.77 | Must enquire |
Battery replacement costs compared
| Make and model | Retail price | Official battery replacement cost | Cheapest 3rd party repair cost |
| Samsung Galaxy A22 5G | £209 | Must enquire | £50(Timpson) |
| Samsung A52 5G | £399 | Must enquire | £49.95(Timpson) |
| Samsung S21 5G | £769 | Must enquire | £59(iSmash) |
| Samsung S22 Ultra | £1,149 | Must enquire | £59(iSmash) |
| Apple iPhone SE 2020 | £399 | £49 | £19.99(Phones Rescue) |
| Apple iPhone 12 | £629 | £69 | £59.95(Timpson) |
| Apple iPhone 13 Mini | £679 | £69 | Must enquire |
| Apple iPhone 13 Pro Max | £1,049 | £69 | £120(Fix Factor) |
| Google Pixel 5 | £599 (now discontinued) | Dependent on model | £59(iSmash) |
| Google Pixel 6 Pro | £849 | Dependent on model | £69(iSmash) |
| Xiaomi 11 Lite 5G NE | £309 | £6.95 (plus £26.45 inspection and £18 shipping cost) | Unavailable |
| Xiaomi 12 | £649 | £13.43 (plus £26.45 inspection and £18 shipping cost) | Unavailable |
| OnePlus Nord 2 5G | £399 | £12 | £80(Fix Factor) |
| OnePlus 9 | £629 | £13 | Must enquire |
| Oppo A54 5G | £219 | £12.60 | Must enquire |
| Oppo Find X3 Neo 5G | £699 | £30.24 | Must enquire |